


 |
Vision test Pro |
 Reading test |
 Reading for childrens |
 Contrast sensitivity |
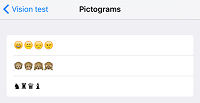
 Emoji test |
 LEA |
 Snellen E test |
 Landot C test |
 Ishihara |
 Amsler grid |
 Astigmatism |
 Sample images |
The test


Page block
In the bottom left corner of the screen there is a padlock that indicates whether the page is bolocked.The lock can be open or closed.
Make sure the page is blocked when you show a test to the patient, otherwise he may unintentionally change to another test if he touches the screen.
Customization
The homepage of the app may be changed adding the name or logo of the clinic or store.
The texts used in the reading tests for adults and children may be edited and personalized.
And the size of all the visual acuity test is suitable to be modified.
In the top-right corner there is a button that activates the “edition mode”
In this edition mode you can:
- Set the logo for the homepage using an image from the camera roll
- Set the name of your clinic or store
- Change the texts of the reading tests
- Change the size of letters and symbols of all the visual acuity tests (reading, LEA, Snellen E, Landot C, Emoji symbols).
- Adjust the contrast at the contrast sensitivity test.
More Settings
There is additional settings in the Settings menu of your iPad 
Here you can:
- Change the size of letters and symbols of all the visual acuity tests (reading, LEA, Snellen E, Landot C, Emoji symbols).
- Adjust the contrast at the contrast sensitivity test.
- Set the number of lines
- In the Amsler Grid you can choose the numbers of squares, and the color of the lines (black lines on withe background or white lines on black background).
- In the astigmatism test you may choose the number and appearance of the lines.

Tests
1 - Reading test
This test will show different literary texts with decreasing font size calibrated to measure near visual acuity.
| Feet | visual acuity |
| 20/200 | 0.10 |
| 20/160 | 0.12 |
| 20/125 | 0.16 |
| 20/100 | 0.20 |
| 20/80 | 0.25 |
| 20/63 | 0.32 |
| 20/50 | 0.40 |
| 20/40 | 0.50 |
| 20/32 | 0.62 |
| 20/25 | 0.80 |
| 20/20 | 1.00 |
You can change the text switching on the Edit button in the homepage.
When the app is on edit mode shows a blue icon in the text windows . Tap on the icon to type your own text .

2 - Reading test for childrens
Same settings and edition as in the adult reading test may be done for the children reading test.
3 - Contrast Sensitivity test
With this test you can measure the patient’s ability to discriminate letters written with four of the most common types of font presented in decreasing size and contrast.
4 - Emoji
5 - LEA test
In edit mode you can calibrate the size of the optotypes moving the adjustment knob on the top bar.


6 - Snellen E test
In edit mode you can calibrate the size of the optotypes moving the adjustment knob on the top bar.


7 - Landolt C test


8 - Ishihara test

9 - Amsler grid
In this test the patient may draw on the screen the area of the grid that is different or has variations.

Once the test is completed for one eye the grid may be printed or emailed, which allows the practitioner to make comparative follow up. Then Proceed with the other eye.

Before you hand the iPad to the patient make sure the screen is lockedby tapping on the padlock on the bottom left corner.
In the Ipad Settings you can select the number of squares forming the grid and the color of the lines and the background, choosing between black and white.

10 - Astigmatism test


In the Ipad Settings you can select the number of lines and if these lines are simple or triple.

10 - Sample images
Here you can select the picture you want to show your patient. This is useful for the patient to verify how well they can see usual images in their daily activities. For example, maps, music sheet, whatsApp screen captures, medicines prospectus, news paper sheet, etc…

